-Installing memory is really a breeze so don't worry to much over it.
-Now, lets put them little guys in. If you are unsure about the memory you have check with your manufacturers specs before proceeding.
-The memory used for systems now is DDR ram, they come in all different speeds and you will need to check the FSB on your CPU as to what memory you can buy. You can buy PC3200 memory for a CPU running at a slower FSB, the memory will just run slower, but the bonus is if you ever upgrade your CPU the memory can FSB increase.
If you would like more information regarding memory check out the memory |Guide|
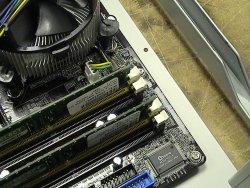
RAM Installed
1. Unplug your computer
2. Remove the system case cover
3. Locate the DIMM slots (refer to the motherboard manual on information such as slot arrangement and dual channel)
4. Open the locking lugs at either end of the memory slot. Line up module with slot. This can be a pain so use a flashlight to see the module's slot. They only go in one way so take your time and don't force it.
5. Push firmly on both sides of the module till it seats. The locking lugs should snap closed, if not just simply do this manually so they hold the ram securely in place.
6. Close system case and boot up
7. You should see a memory count on POST (power on self test)
-That wasn't so bad now was it. Now should you have run into problems, make sure modules are seated properly.
Replace Cache (ONLY APPLICABLE TO ANCIENT SYSTEMS (AND I DO MEAN ANCIENT))
-Replacing the Cache chip can be a pain. If you are having to do this dirty deed take your time. Cache isn't cheap and you don't want to ruin it.
1. Shut Down PC
2. Identify the L2 cache module which is usually alone and close to the CPU. Check your motherboard or system documentation for more information of L2 Cache placement.
3. Pull module out up and straight. Don't pry it.
4. If the module is still giving trouble pull one edge up at a time and just a little.
5. Put cache in safe place and be ready for new module.
6. Align new module with notch on SIMM socket. There will also be a notch on the cache.
7. Ease module down into SIMM slot until seated firmly. Do not ram it in to hard. Take your time.
8. Clear anything out of the case you used to install the cache
9. Boot up